Making Scale Models Using a 3D Printer
In this two- or three-day lesson, students will learn to apply their skills and understanding of scaled mathematical relationships to create a scale model of an object using either 3D modeling software and then a 3D printer or by measuring and building an object out of cardboard.
BC Curricular Connections:
Mathematics 9: Similar shapes have proportional relationships that can be described, measured, and compared.
ADST 9: Complex tasks require the sequencing of skills; Complex tasks require different technologies and tools at different stages.
Required background knowledge: Students should already have learned the mathematical calculations required in scaling dimensions, but they will review it in these lessons. This is a great project to finish a unit on scale and proportions.
Lesson Plan
Tools:
Projector connected to device with internet access
iPads for students with the Measure app
Computer for each student with internet access
3D Printer (having more than one will save time printing)
3D Printing filament
Meter sticks and rulers
Cardboard
Scissors
Tape
Glue
Protractors for measuring angles
Lesson 1, Introduction:
Play the "Center for Kids Who Can't Read Good" clip from the movie "Zoolander"
-Ask the students what mistakes Derek Zoolander made when he saw the model of the Center and use this as a conversation starter to discuss what scale models are.
-Where are some places we might use scale models and why? Ask students to brainstorm in small groups then share with class (some examples: architecture, design prototypes, decorative figurines, film sets and props, toys, hobby building, military command, board games).
Warmup: Measuring objects using measurement tools and the Measure app.
Warmup: Measuring objects using measurement tools and the Measure app.
-To make a scale model of an object, you first need to know the dimensions (measurements) of the actual object.
-Demonstrate to the class how to use the Measure app on their iPad to measure objects.
-Ask the students to pair up. They will each measure three things using both the app on their iPad and the meter stick or ruler and compare the results. They will measure a handheld object (like a book), a piece of furniture (like a desk or a shelf), and a large object (like a wall or large window).
-Ask the class how their measurements compare and what this says about the reliability of measurements, measuring tools, and choosing the best tool for the job.
Review, Scale Models:
-Review with class how to calculate scaled dimensions from the actual size.
-Ask students to calculate a scale model of one of the objects they measured earlier: For example, what would be the height of the desk if you shrunk it down to fit on top of the book?
Introduction to 3D Modeling Software, Tinkercad:
-Demonstrate the use of Tinkercad to the class. Talk them through creating a login and the creation of a simple design for a sign with their name on it (similar to the video below) or other simple design project. This familiarizes them with the use of the software.
Lesson 1, Wrap-Up:
-Show students some 3D printed objects and explain that they are made by the 3D printer from models like the ones they just made.
-Give students their homework: Measure an object they want to make a scale model of! They will have the choice of making a larger version of a small object out of cardboard or a small version of a large object using the 3D printer or cardboard. They can use the measurements of a mini-desk from earlier or they can choose any other object, including a whole building if they like.
-Discuss with them how to choose an object to make a scale model of - simple shapes and objects with angles instead of curves are easiest.
Day 2, Introduction:
-Remind students that they are going to be building a scale model. Show them some scale models as inspiration (actual physical scale models if you have them or pictures in a slide show).
-Make sure all students have chosen and measured an object to create a scale model of. Otherwise, instruct them to measure an object nearby (or find one online with dimensions. Ikea is a great source).
Review and Setup:
-Review once again how to calculate dimensions for a scale model. Give students a few minutes to calculate the dimensions for their scale model.
-Demonstrate again how to get into Tinkercad so that students can begin to make a scaled 3D model of their object to print. Remind them of the maximum dimensions for your 3D printer. I recommend nothing over 10cm in any dimension, regardless of 3D printer model, to cut down on printing time.
-Give students the option to create a scale model in Tinkercad to be 3D printed or they can cut out and tape or glue together a cardboard scale model.
-While students are working, circulate and check their calculations to make sure their scale models are correct.
Prepare to 3D Print:
-When a student is done, or close to being done their 3D model in Tinkercad, demonstrate to the class how to save their file and download it for 3D printing (see video above).
-Demonstrate to class how to prepare a file for 3D printing. For information on how to do this with your 3D printer, see the Dimensions website specifically designed for educators learning to 3D print.
-Instruct students to make their slice thickness quite thick. This is because their designs are likely to be simple and geometric, but also to cut down on printing time since there are likely to be quite a few designs to print.
Day 2, Finishing up:
-Use your judgement to see whether or not the students will need extra in-class time to work on their 3D models or cardboard creations. At least one more lesson's worth of in-class time is likely necessary.
-As soon as the first student is finished preparing their file for 3D printing, get it started on the printer so that the other students can see how it works. The rest of the files may need to be started at later times, in between classes or after school.
-Depending on how many students opt to create 3D printed models, it could take some time for all of their models to be completed. Instruct them that, once their model is done, they should hand it in along with their scale model calculations.
Lesson Modifications: Other ideas for including 3D models in the curriculum
-Design and build a prototype of an invention
-Create, print and paint a 3D model in an art class
-Build props for a stop-motion video
-Create a model of an item associated with character from a novel, or from a historical period
-Make models of parts for physics experiments
Citations:
Ben Stiller, David Arnold, Nicholas Dodd, R. K., Randall Poster, G. D. & Nicholas Dodd, R. K. (2001) ZOOLANDER. USA/Germany/ Australia. Clip retrieved from https://www.youtube.com/watch?v=NQ-8IuUkJJc
Chaos Core Tech (November 23, 2015). How to Make Models for 3D Printing - Tinkercad Beginner's Tutorial. Retrieved from https://youtu.be/gsz2PNcAcPA
Neilson, Sonya (2019). Dimensions: Beginners 3D Printing for Education. Retrieved from https://dimensionsed.weebly.com/
TeachEngineering (October 11, 2018). Math Relationships: Scale Model Building Project. Retrieved from https://www.youtube.com/watch?v=Pqto6sWj-cw
Techboomers (September 27, 2018). How to Use the Measure App in iOS 12 - Who Needs a Ruler? Retrieved from https://www.youtube.com/watch?v=GbnIWW82CBI
-Demonstrate to the class how to use the Measure app on their iPad to measure objects.
-Ask the students to pair up. They will each measure three things using both the app on their iPad and the meter stick or ruler and compare the results. They will measure a handheld object (like a book), a piece of furniture (like a desk or a shelf), and a large object (like a wall or large window).
-Ask the class how their measurements compare and what this says about the reliability of measurements, measuring tools, and choosing the best tool for the job.
Review, Scale Models:
-Review with class how to calculate scaled dimensions from the actual size.
-Ask students to calculate a scale model of one of the objects they measured earlier: For example, what would be the height of the desk if you shrunk it down to fit on top of the book?
Introduction to 3D Modeling Software, Tinkercad:
-Demonstrate the use of Tinkercad to the class. Talk them through creating a login and the creation of a simple design for a sign with their name on it (similar to the video below) or other simple design project. This familiarizes them with the use of the software.
Lesson 1, Wrap-Up:
-Show students some 3D printed objects and explain that they are made by the 3D printer from models like the ones they just made.
-Give students their homework: Measure an object they want to make a scale model of! They will have the choice of making a larger version of a small object out of cardboard or a small version of a large object using the 3D printer or cardboard. They can use the measurements of a mini-desk from earlier or they can choose any other object, including a whole building if they like.
-Discuss with them how to choose an object to make a scale model of - simple shapes and objects with angles instead of curves are easiest.
Day 2, Introduction:
-Remind students that they are going to be building a scale model. Show them some scale models as inspiration (actual physical scale models if you have them or pictures in a slide show).
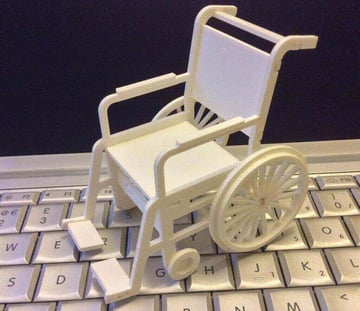 |
| 3D printed scale model of a wheelchair. Image care of All3DP. |
 |
| Cardboard scale model of a train car. Image care of World 360. |
Review and Setup:
-Review once again how to calculate dimensions for a scale model. Give students a few minutes to calculate the dimensions for their scale model.
-Demonstrate again how to get into Tinkercad so that students can begin to make a scaled 3D model of their object to print. Remind them of the maximum dimensions for your 3D printer. I recommend nothing over 10cm in any dimension, regardless of 3D printer model, to cut down on printing time.
-Give students the option to create a scale model in Tinkercad to be 3D printed or they can cut out and tape or glue together a cardboard scale model.
-While students are working, circulate and check their calculations to make sure their scale models are correct.
Prepare to 3D Print:
-When a student is done, or close to being done their 3D model in Tinkercad, demonstrate to the class how to save their file and download it for 3D printing (see video above).
-Demonstrate to class how to prepare a file for 3D printing. For information on how to do this with your 3D printer, see the Dimensions website specifically designed for educators learning to 3D print.
-Instruct students to make their slice thickness quite thick. This is because their designs are likely to be simple and geometric, but also to cut down on printing time since there are likely to be quite a few designs to print.
Day 2, Finishing up:
-Use your judgement to see whether or not the students will need extra in-class time to work on their 3D models or cardboard creations. At least one more lesson's worth of in-class time is likely necessary.
-As soon as the first student is finished preparing their file for 3D printing, get it started on the printer so that the other students can see how it works. The rest of the files may need to be started at later times, in between classes or after school.
-Depending on how many students opt to create 3D printed models, it could take some time for all of their models to be completed. Instruct them that, once their model is done, they should hand it in along with their scale model calculations.
Lesson Modifications: Other ideas for including 3D models in the curriculum
-Design and build a prototype of an invention
-Create, print and paint a 3D model in an art class
-Build props for a stop-motion video
-Create a model of an item associated with character from a novel, or from a historical period
-Make models of parts for physics experiments
Citations:
Ben Stiller, David Arnold, Nicholas Dodd, R. K., Randall Poster, G. D. & Nicholas Dodd, R. K. (2001) ZOOLANDER. USA/Germany/ Australia. Clip retrieved from https://www.youtube.com/watch?v=NQ-8IuUkJJc
Chaos Core Tech (November 23, 2015). How to Make Models for 3D Printing - Tinkercad Beginner's Tutorial. Retrieved from https://youtu.be/gsz2PNcAcPA
Neilson, Sonya (2019). Dimensions: Beginners 3D Printing for Education. Retrieved from https://dimensionsed.weebly.com/
TeachEngineering (October 11, 2018). Math Relationships: Scale Model Building Project. Retrieved from https://www.youtube.com/watch?v=Pqto6sWj-cw
Techboomers (September 27, 2018). How to Use the Measure App in iOS 12 - Who Needs a Ruler? Retrieved from https://www.youtube.com/watch?v=GbnIWW82CBI
Comments
Post a Comment